 Windows WiFi Instructions
Before You Begin
Before you can use our system you must first signup for an account.
Once you do you will receive two emails which will contain your
LoginID, Domain and Password. Keep this information handy as you
will need it during the installation process.
The following instructions are also available to download
as pdf.
Installation Instructions
- Download the installation file: Tempest
Dialer
- Double-click on the downloaded file
- Follow the displayed directions.
Make sure that your connectivity device (modem or broadband adapter)
has been installed and configured properly before connecting to
the service.
Setting Preferences
User Info
You'll receive two e-mails within twenty-four hours of signing
up to Tempest Telecom's service. These e-mails will contain your
user name, domain, and password.
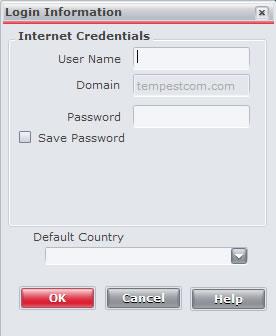
To set your user name, domain and password in iPassConnect:
- Choose 'Login Information' from the 'Settings' menu

- Enter your user name. (The domain is already provided)
- Enter your password and check 'Save Password' to save your
password for future connections.
- Set your default Country.
Selecting Your Wireless Card
If you are using the WiFi service, you need to configure iPassConnect
to use the correct wireless access card.
To specify your wireless card:
- Choose 'Connection Settings' from the 'Settings' menu

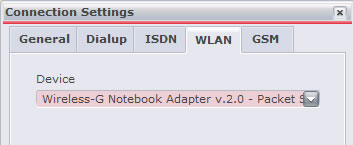
- Select the correct wireless card under 'Device'
- Click 'OK'
Wireless Broadband settings
If you'll be using the wireless broadband service, you'll need
to make sure that the dial settings are set accordingly.
Configuring wireless broadband (WiFi):
- Select 'Control Panel' from the Windows Start menu.
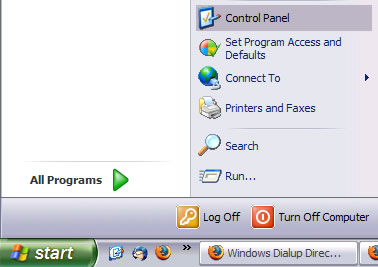
- Select 'Network Connections'

- Double click on 'Wireless Network Connection' to make sure
it is enabled


General Preferences
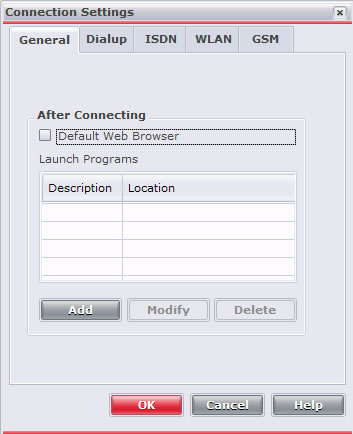
Select 'Connection Settings' from the 'Settings' menu. The 'General'
tab allows you to designate any programs to open as soon as you
are connected to the service.

Phonebook Updates
Before using the dialer for the first time, or after a long
time of not using the service, you'll need to update the Phonebook.
The Phonebook contains all access numbers and points available
to you through Tempest's service.
Manually Update the Phonebook:
You'll need to be connected to the Internet in order to manually
download the Phonebook.
In the 'Settings' menu, select 'Update iPassConnect' and then
select 'Phonebook'.

A window will open with the status of the download.
Mandatory Phonebook Updates
iPassConnect will also automatically check at periodic intervals
see if there are any updates available. If so, you may be prompted
to download and install the update.
Connecting with WiFi (Wireless Broadband)
To connect to the service using a WiFi (wireless broadband)
connection:
- Search for access points by entering the country, state,
and city that you're located.

- Select the access point from the search results, under the
heading ‘Wireless Broadband’.
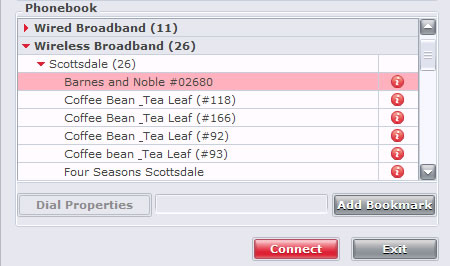
- Make sure you have a signal at your location by clicking
on the red circle with the 'i ' in the middle located
in the right hand column
- If there is a signal click on 'Connect'.
- To disconnect from the service, click on 'Disconnect' on
the connection status window.
Note: There may not be wireless access points for the city you
are located. You need to be at the location in order to connect
to the access point.
Troubleshooting
If for some reason you are unable to connect please contact
customer support:
Toll-free: (888) 596-8735
International: (480) 348-0442
Help ticket: http://support.tempestcom.com/support/users/tickets.php?op=add
Online Chat: http://www.tempestcom.com/support/home.aspx
and Select 'Live Chat'
